Pizza is a beloved food that has been enjoyed by people for generations. There’s something about the combination of crispy crust, melted cheese, and savoury toppings that makes it an irresistible treat. And while many of us enjoy going out for pizza, there’s nothing quite like making it at home. If you’re a true pizza lover, you might have considered building your own pizza oven. We will provide you with step-by-step instructions on how to build a pizza oven, as well as some tips and tricks to help you along the way.
We have the Igneus Ceramiko Range if you want to customise your pizza oven but don’t want to use bricks. The Ceramiko comes in parts that you assemble and then finish the external of the oven to your preferred style.
Step 1: Choose your location
Before you start building your pizza oven, you need to choose the location where it will be installed. The location should be level and away from any flammable objects, such as trees or buildings. You should also check with your local council to see if there are any restrictions on outdoor cooking appliances.
Step 2: Gather your materials
Building a pizza oven requires a few materials, such as bricks, cement, sand, and fireclay. You’ll also need a few tools, including a trowel, level, and masonry saw. Some of the materials can be found at your local home improvement store, while others might need to be ordered online.
Step 3: Build the base
The first step in building your pizza oven is to create a sturdy base. You can use concrete blocks or bricks to build the base. Make sure the base is level and secure, as this will provide a stable foundation for the rest of the oven.
Step 4: Create the oven floor
The oven floor is one of the most important parts of the pizza oven. It needs to be able to withstand high temperatures and provide a smooth surface for the pizza to cook on. You can create the oven floor using firebricks or refractory concrete. Lay the bricks or concrete in a herringbone pattern, using sand to level them as you go.
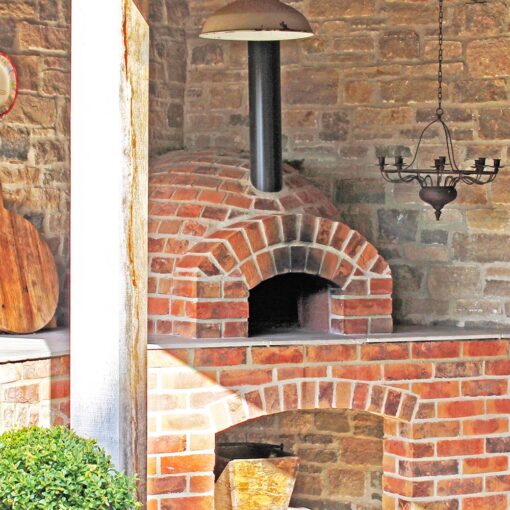
Step 5: Build the dome
The dome is the most distinctive part of the pizza oven. You can build the dome using either bricks or a precast dome kit. If you’re using bricks, you’ll need to create a wooden frame to support the dome while it’s being built. Lay the bricks in a circular pattern, gradually decreasing the size of the circle as you go. Use fireclay mortar to hold the bricks in place.
Step 6: Add insulation
Insulation is important to keep the heat inside the pizza oven. You can use ceramic fibre to insulate the oven. Apply a layer of insulation over the dome, then cover it with a layer of chicken wire. Finally, add a layer of render over the chicken wire to protect the insulation.
Step 7: Install the chimney
The chimney is important to vent the smoke and heat out of the pizza oven. You can install a metal or clay chimney on top of the dome. Make sure the chimney is tall enough to clear any nearby obstacles.
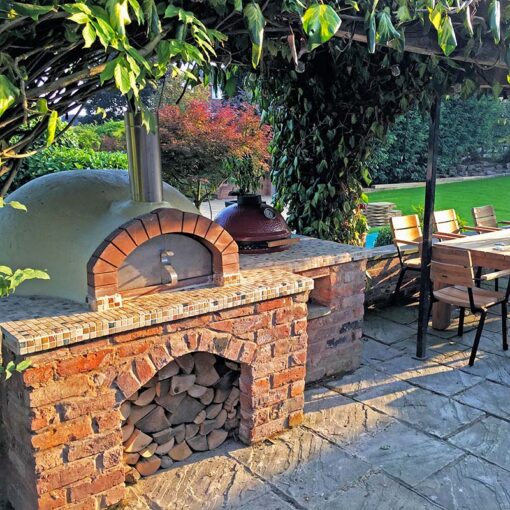
Step 8: Add the finishing touches
Once the pizza oven is built, you can add the finishing touches. You can create a decorative facade around the oven using bricks or tiles.

Building a pizza oven is a rewarding project that can provide you with years of delicious homemade pizza. It does require some planning and hard work, but the end result is worth it. By following these step-by-step instructions, you’ll be able to build your own pizza oven and start enjoying your favourite pizza recipes in the comfort of your own backyard.